Wednesday, July 23, 2014

Core 2: Learning Outcome 4- Create An Address Book

Learning Criteria: 

  • E-mail address is added to the e-mail package address book
  • The address book is updated by transferring the e-mail address from a received message
  • E-mail messages are sent using the distribution list created in the address book


Procedures/Steps

Core 2: Learning Outcome 3- Send and Organize Message

Learning Criteria: 

  • E-mail software is used to create an e-mail account.
  • Open an existing e-mail account.
  • An e-mail message is composed based on requirements.
  • An automatic signature for the user was created as specified.
  • Files are attached to the e-mail message, using the attachment feature
  • A priority is set or assigned to an e-mail message.
  • The e-mail message is sent
  • Received messages with attachments are opened as required.
  • Attachments are saved to the relevant folder
  • Received messages are answered as specified.
  • Received messages are forwarded using the carbon copy and forward features according to requirements.
  • An e-mail message is searched according to requirements.
  • E-mail priority is set and deleted as necessary.
  • Inbox is sorted according to sender’s name or date received.
  • E-mail messages are saved in a folder as prescribed by the requirements.


Procedures/Steps:

Core 2: Learning Outcome 2- Search the Internet

Learning Criteria:


  • A search engine is located according to the requirements.
  • Provide search engine with search expressions based on the data required.
  • Search expression results are saved and presented in a report, according to the information requirements.
  • A bookmark is created and saved within the Internet browser or a link for the required Internet page.
  • The Internet browser options are modified for printing a web page
  • The Internet browser is closed


Overview of the Output:


Core 2: Learning Outcome 1- Access The Internet

Learning Criteria: 


  • Internet browser is opened and a Home page of personal choice is set using Internet options.
  • The display of the Internet browser is adjusted to suit personal requirements.
  • Toolbar is modified to meet user and Internet browser needs.
  • Uniform Resource Locator (URL ) is entered in the address line of the internet browser.
  • A particular site is accessed and data is retrieved

Overview of the Output:

Core 1: Learning Outcome 6- Mail Merge and Print Word Processing Documents

Learning Criteria: 


  • Use mail merge to create form letter, mailing labels, and other merge documents as required
  • Select appropriate print setting as needed
  • Preview and print documents


Procedures/Steps: 

Microsoft Office Word 2007

On the Mailings tab, click Start Mail Merge, and then click Step by Step Mail Merge Wizard.

Select document type

  1. In the Mail Merge task pane, click Letters. This will allow you to send letters to a group of people and personalize the results of the letter that each person receives.
  2. Click Next: Starting document.

Select the starting document

  1. Click one of the following options:
    • Use the current document: Use the currently open document as your main document.
  2. In the Mail Merge task pane, click Next: Select recipients.

Select recipients

When you open or create a data source by using the Mail Merge Wizard, you are telling Word to use a specific set of variable information for your merge. Use one of the following methods to attach the main document to the data source.


Method 1: Create a database of names and addresses

To create a new database, follow these steps:
  1. In the Mail Merge task pane, click Next: Select Recipients.
  2. Click Type a new list.
  3. Click Create.

    The New Address List dialog box appears. In this dialog box, enter the address information for each record. If there is no information for a particular field, leave the box blank.

    By default, Word skips blank fields. Therefore, the merge is not affected if blank entries are in the data form. The set of information in each form makes up one data record.
  4. After you type the information for a record, click New Entry to move to the next record.

    To delete a record, click Delete Entry. To search for a specific record, click Find Entry. To customize your list, clickCustomize. In the Customize Address List dialog box, you can add, delete, rename, and reorder the merge fields.
  5. In the New Address List dialog box, click OK. In the Save Address List dialog box, type the name that you want to give to your data source in the File name (\\server\grade __?\your section) box, and then click Save.
  6. In the Mail Merge Recipients dialog box, make any changes that you want, and then click OK.
  7. Click Next: Write your letter to finish setting up your letter.
  8. Save the main document.

    When you save the main document at this point, you are also saving the data source and attaching the data source to the main document.
  9. Type the name that you want to give to your main document, and then click Save.
To proceed to the next step, click Next: Write your letter.

Write your letter

In this step, you set up your main document.
  1. Type or add any text and graphics that you want to include in your letter.
  2. Add the field codes where you want the variable information to appear. In the Mail Merge task pane, you have four options:
    • Address block: Use this option to insert a formatted address.
    • Greeting line: Use this option to insert a formatted salutation.
    • Electronic postage: Use this option to insert electronic postage.

      Note This option requires that you have a postage software program installed on your computer.
    • More items: Use this option to insert individual merge fields. When you click More Items, the Insert Merge Fielddialog box appears.

      Note Make sure that your cursor is where you want to insert the information from your data source before you click More Items.

      In the Insert Merge Field dialog box, click the merge field that you want to use, and then click Insert.

      Note You can insert all of your fields and then go back and add any spaces or punctuation. Alternatively, you can insert one field at a time, close the Insert Merge Fields dialog box, add any spaces or punctuation that you want, and then repeat this step for each additional merge field that you want to insert. You can also format (apply bold or italic formatting to) the merge fields, just like regular text.
  3. When you finish editing the main document, click Save or Save As on the File menu.

    Note In Word 2007, click the Microsoft Office Button, and then click Save or Save As.

    Name the file, and then click Save. To proceed to the next step, click Next: Preview your letters.

Preview your letters

This step allows you to preview your merged data, one letter at a time. You can also make changes to your recipient list or personalize individual letters.

To proceed to the next step, click Next: Complete the merge.

Complete the merge

This step merges the variable information with the form letter. You can output the merge result by using either of the following options:
  • Print: Select this option to send the merged document directly to the printer. You will not be able to view the document on your screen.

    When you click Print, the Merge to Printer dialog box appears. In the Merge to Printer dialog box, you can choose which records to merge. When you click OK, the Print dialog box appears. Click Print to print the merge document.
  • Edit individual letters: Select this option to display the merged document on your screen.

    When you click Edit individual letters, the Merge to New Document dialog box appears. In the Merge to New Document dialog box, you can choose which records to merge. When you click OK, the documents are merged to a new Word document.

    To print the file, on the File menu, click Print.

    Note In Word 2007, click the Microsoft Office Button, and then click Print.

Core 1: Learning Outcome 5- Add Image

Learning Criteria: 


  • Insert pictures in a document according to requirements.
  • Position pictures according to requirements.
  • Crop pictures according to requirements.
  • Resize pictures to meet the document formatting needs.
  • Insert drawing objects in a document according to requirements.
  • Format drawing objects according to requirements.
  • Print Document


Overview of the Output:

1. Click "Insert" menu then choose "Picture" in Illustration ribbon, then choose any picture

2. Position the picture in the center. (click the picture then click "Home" menu then click "Center" in paragraph ribbon.)

3. Crop your picture or re-size it to 2x2 inches.
    a. Cropping. Click the picture then click "Format" menu then look for "Size" Ribbon then click crop. You can see Bold angle in the edge of the picture or bold horizontal and vertical line. You click on it and drag to the desired size.
    b. Re-size. Click the picture then click "Format" menu then look for "Size" Ribbon just enter the size value in the text boxes.

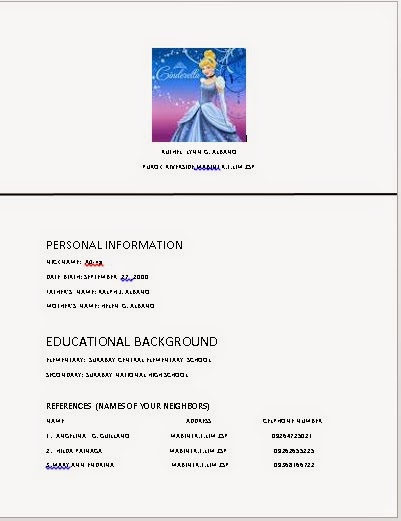
4. Below the picture, Write your Fullname, and below your fullname write your address. 

5. After your address, press enter twice then click "Insert" menu and choose "Shapes" in illustrations ribbon. Choose "Line" and click and drag from left to right. 

6. Change the weight of the line to 3 pt by clicking the line then click "Format" menu then in shape styles ribbon, click the "Shape Outline" then click "Weight" then click 3 pt. 

6. Below the line, provide your basic in formation like this: 

Personal information

Nickname: 
Date of Birth: 
Father's Name:
Mother's Name: 

Educational Background

Elementary: 
Secondary: 

References (Name of your neighbors)
Name                                               Address                                      Celphone Number

1.
2. 
3. 

7. Save Your work with the file name: LO5 - Adding Image 

Core 1: Learning Outcome 4- Create and Format Tables

Learning Criteria: 

  • Insert table is into a document as required.
  • Copy table is into a document as required.
  • Create table elements according to requirements.
  • Edit table elements according to requirements.
  • Format table elements to meet information requirements
  • Print Document

Overview of the Output:


Prerequisite: Download Zamsureco II Logo and save it in your folder (\\server\Grade __\Your Section\Your Name)

Procedures: 

1. Click "Insert" menu choose "Picture" in illustrations ribbon then choose the logo of Zamsureco II you have just downloaded. 

2. Right click the picture then choose "Format Picture" then click "Layout" tab then choose "Square" in "Wrapping Style". Click "Size" tab then type 1.5 in "Height" and 1.5 in "Width". 

3. Position your cursor at the top of the logo. Then copy or type the text below: 

Zamsureco II
Pangi, Ipil, Zamboanga Sibugay
TIN 700-00-944-830 VAT

STATEMENT OF ACCOUNT

Name: ____________________________________   Code: _________
Address: __________________________________   Serial: _________

4. Align Center "STATEMENT OF ACCOUNT"
5. Insert Table 4x8 table
6. In Column 1, Row 1, type "Account Code" 
7. In Column 2, Row 1, type "No. of KVA"
8. In Column 3, Row 1, Type "Meter Number" 
9. In Column 4, Row 1, Type "Consumer Type" 
10. In Column 1, Row 3, Type "Pole Number"
11. In Column 2, Row 3, Type "Pres. Reading"
12.  In Column 3, Row 3, Type "Prev. Reading"
13.  In Column 3, Row 3, Type "Kwh Used"
14. Select Column 1-3 and Row 5-6, then click "Layout" menu and choose "Merge Cells" in merge ribbon. 
15. Type "TOTAL EVAT AMOUNT" press enter. Then type "TOTAL AMOUNT DUE PHP". Align "TOTAL EVAT AMOUNT" in column 4, row 5. Align "TOTAL AMOUNT DUE IN PHP in column 4, row 6.
16. Row 7, column 1, type "BILLING MONTH:" in Column 4, row 7, type "DATE" 
17. In Row 8, Column 1, type "READ BY: 
18. Select Row 1, column 1-4, then click "Home" menu and choose "Align Center" in Paragraph ribbon

You have just created a table. 

19. Below the table, copy or type: 

This Bill is Due on: __________________
Please Pay at: _____________________
Please pay this bill on or before due date or we will have to discontinue serving your electric needs. 

This is not an official receipt. Pay your bill promptly. 

20. Re-size the text "Please pay this bill on or before due date or we will have to discontinue serving your electric needs. " to 10 pt. 

21. Re-size the text "This is not an official receipt. Pay your bill promptly." to 7 pt. 


22. Save your work with the filename "LO 4-Create and Format Tables.